Author

Randall Callahan

Browsing

Central Texas does not get hard freezes every year, and that is exactly the problem. Because deep cold is rare, many homes here were built with little thought for frozen pipes. Outdoor spigots sit exposed, attic lines run without insulation, and plenty of homeowners have never even located their main shutoff valve. When a hard freeze finally rolls in, the surprise can cost thousands in water damage. The team at Plumb Intended has helped many homeowners deal with the aftermath, and the lesson is always the same: an hour of preparation beats a week of cleanup.

This guide is organized by timing, so you can act on the right steps at the right moment. Think of it as three phases: the calm before the freeze, the night of the freeze, and the morning after.

Phase One: The Calm Before the Freeze

The best time to prepare is on a mild, sunny afternoon, not the evening the forecast turns scary. Set aside an hour this week and work through the list below.

Find and test your main shutoff valve

If a pipe bursts, every minute counts. Walk around your home and locate the main water shutoff, which is often near the water heater, in a garage, or on an exterior wall. Turn it off and on once to make sure the handle moves freely. A valve that has not been touched in years can be stuck or corroded, and it is far better to learn that now. Make sure everyone in the household knows where it is.

Know which pipes are most at risk

The American Red Cross points to three trouble spots. The first is pipes exposed to severe cold, like outdoor hose bibs and sprinkler lines. The second is supply pipes in unheated interior spaces such as attics, garages, crawl spaces, and kitchen cabinets. The third is pipes that run along exterior walls with little or no insulation. Take a slow walk around your property and make a quick map of where each of these lives.

Protect the outdoors first

  • Disconnect, drain, and store garden hoses.
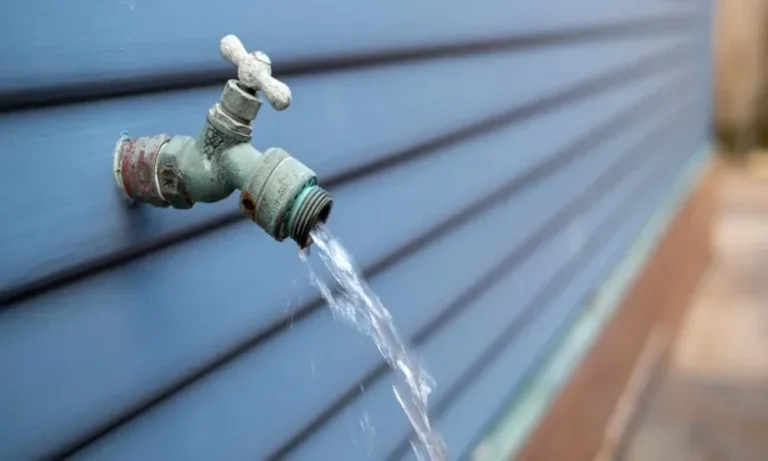
  • Close the interior valve that feeds each outdoor spigot, then open the outside spigot to let trapped water drain.
  • Drain sprinkler and pool supply lines according to the installer’s directions.
  • Cover exposed spigots with insulated covers, which are inexpensive and easy to install.

Wrap the vulnerable lines

Foam pipe sleeves cost very little and slide on in seconds. Insulate both hot and cold lines in garages, attics, and under cabinets. For stubborn spots, UL-listed heat tape or heat cable can add extra protection. Just follow the manufacturer’s directions closely, since improper use of electric heating products can create other hazards. The Red Cross lays out these steps and more in its guide to preventing and thawing frozen pipes.

Check the equipment people forget

Look over your water heater, since a unit in an unheated garage faces more stress in the cold. Confirm that any exposed pipes near it are wrapped, and inspect visible fittings for leaks that could worsen when temperatures drop. If your home has a gas water heater or gas appliances, remember that the smell of gas means you should leave the house and call your gas utility from outside.

Phase Two: The Night of the Freeze

When the forecast confirms a hard freeze, shift into protection mode.

  1. Open cabinet doors. Doors under kitchen and bathroom sinks, especially on exterior walls, let warmer room air reach the pipes. Move cleaning products out of reach of children first.
  2. Let faucets drip. The Red Cross advises letting cold water trickle from a faucet served by exposed pipes. Moving water is much harder to freeze, and a small waste of water is cheaper than a burst line.
  3. Hold the thermostat steady. Resist the urge to turn the heat down overnight. A consistent temperature day and night costs a little more but protects your plumbing.
  4. Keep garage doors closed if water lines run through the garage.
  5. Leaving town? The Red Cross recommends keeping the heat on and set no lower than 55 degrees Fahrenheit. You can also ask a trusted neighbor to check on the house.

Also keep a flashlight, a towel or two, and your plumber’s phone number within easy reach. If the power goes out, remember that your heating system may not run, which makes dripping faucets and open cabinets even more important.

Phase Three: The Morning After

After a freeze, the first signal of trouble is usually a faucet that gives you only a trickle. If that happens, treat it as a frozen pipe. According to the Red Cross, likely culprits are pipes against exterior walls or where the water line enters through the foundation.

How to thaw a pipe safely

  • Leave the faucet open so water can flow as the ice melts.
  • Apply gentle heat using a hair dryer, an electric heating pad wrapped around the pipe, a portable space heater kept well away from flammable items, or towels soaked in hot water.
  • Never use a blowtorch, propane heater, charcoal stove, or any open flame.
  • Keep applying heat until full water pressure returns, then check every other faucet, because if one pipe froze, others may have too.

What to do if a pipe bursts

If you see water spraying or pooling, shut off the main valve right away, switch off power to any affected area if you can do so safely, and move belongings out of harm’s way. Take photos for your insurance claim before cleanup begins, then call a licensed plumber.

Watch for slow leaks after the thaw

A pipe can crack while frozen yet only start leaking once the ice melts and pressure returns. Check ceilings, walls, and cabinets over the next few days for stains, bubbling paint, or the sound of running water. Your water meter is a handy detector: shut off everything that uses water, note the reading, and check it again after a couple of hours. If the number moved, a hidden leak may be at work.

When to Call a Professional

Some jobs are not worth the risk. Call a licensed plumber if you cannot find the frozen section, if it sits inside a wall or ceiling, if the pipe thaws but starts leaking, or if you simply cannot get water pressure back. A pro can also upgrade your home’s weak points before the next cold snap, from rerouting exposed lines to installing proper insulation and freeze protection around the water heater.

A Small Checklist to Keep on the Fridge

Print it, stick it up, and you will be ready long before the first frost warning appears.

Ready When the Cold Arrives

Freeze preparation is one of the cheapest, most effective home projects you can tackle all year. If you would like a professional to inspect your pipes, wrap problem areas, or check your water heater before the cold arrives, call Plumb Intended at (512) 630-9968 for a free estimate. The family-owned team in Georgetown serves Leander and communities across Central Texas, and they offer emergency service for the surprises that no checklist can prevent.
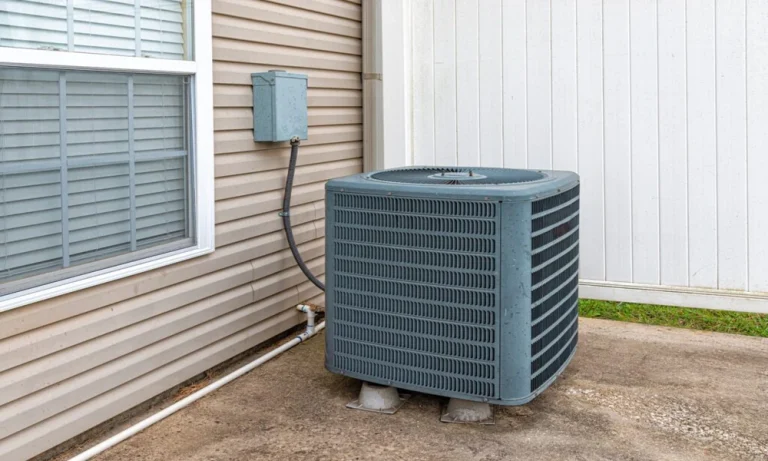

An air conditioner’s rated lifespan is worked out under tidy conditions, and the Gulf Coast has never been tidy. Salt drifts in off the water, humidity hangs around for most of the year, and the cooling season stretches from spring well into autumn. Technicians at Perdido Heating and Air, a Carrier dealer in Pensacola with about fifty years in the trade, see the results every summer, usually in a unit that is only a few years past its warranty and already wheezing. What follows is a tour of the system, one part at a time, and what the coast tends to do to each.

Salt Is the Quiet Culprit

Salt-laden air settles on the metal surfaces of the outdoor unit and holds moisture against them, which speeds up corrosion. The damage is slow. Fins on the coil thin out, fasteners rust, electrical connections pit and the cabinet starts to flake. Homeowners rarely spot it directly. What they notice instead is a gradual loss of cooling power and a bill that creeps upward.

Two habits help more than people expect. Rinse the outdoor coil gently with a garden hose during the cooling season after switching the power off, and never use a pressure washer, which bends fins and can soak electrical parts. Then keep shrubs and fencing back from the cabinet so salt spray does not get trapped against it. When the time comes to replace a unit, ask about coated coils and upgraded hardware made for coastal use.

Humidity Does the Real Work

Cooling is only half of what your system does in a place like Pensacola. The other half is pulling moisture out of the air, and that only happens while the compressor runs. A unit that is too large cools the house fast, shuts off and leaves the air clammy, then repeats the cycle all afternoon.

Research from the Florida Solar Energy Center found that oversized systems are common in the state and that many contractors size up on purpose to please customers who want a colder house. Short runs mean less moisture removal, and the constant starting and stopping wastes energy. Bigger is not better here. A proper load calculation for your specific house is what keeps a replacement from making the same mistake.

The Drain Line Nobody Thinks About

All that removed moisture has to go somewhere. It collects in a pan and leaves through a condensate drain, and in a warm, humid climate that line is a perfect place for algae and slime to build up. When it clogs, water backs up and can spill into the ceiling or stop the system through a safety switch.

If you ever see water around the indoor unit, a damp smell in the closet or a system that quits on the hottest day, ask for the drain to be checked. It is among the cheapest fixes in the whole system and one of the most expensive to ignore.

Filters, Ducts and the Air You Actually Breathe

Humidity and dust make a great team. A filter that has not been changed forces the blower to work harder, cuts airflow across the coil and gives mold a place to settle. Ducts running through a hot attic add their own trouble, since leaks pull in warm, damp air and make the system chase its own tail.

Indoor air quality is worth a mention here too. If someone in the house has allergies, or the air smells stale despite regular cleaning, options such as better filtration, duct sealing and humidity control can be added to an existing system.

Storm Season Homework

Hurricane season brings its own set of risks to cooling equipment. Power surges can fry control boards and compressors, so ask about surge protection when a technician is on site. Clear loose items and debris from around the outdoor unit before a storm, and after any flooding, do not run the system until someone has inspected it, since water in electrical parts and motors is a real hazard.

Why Short Winters Make Heat Pumps Sensible

Gulf Coast winters are mild and brief, which makes the humble heat pump a natural fit. One machine provides cooling in summer and warmth on cold nights, so you are not paying to maintain a separate furnace and condenser. Ductless mini splits suit additions, converted garages and rooms the main system never cooled well. Geothermal heat pumps also exist for homeowners willing to invest more up front for lower running costs.

A Maintenance Calendar That Respects the Coast

Professional service about twice a year is a sensible target near salt water, once before cooling season and once before the heating season. A simple rhythm looks like this.

  • Early spring, a full tune-up with an inspection of electrical connections and contactors
  • Spring and summer, a gentle coil rinse and a drain line check
  • Every month or two in peak season, a fresh filter
  • Early fall, a heating check before the first cold snap
  • Before storm season, a quick look at surge protection and the area around the unit

Keep the paperwork from every visit. Records make warranty claims far easier when something does fail.

Knowing When to Stop Repairing

Every system reaches a point where repairs cost more than they are worth. The signs are familiar. The unit is well past ten years old, repairs are arriving back to back, rooms cool unevenly, or utility bills climb with no change in habits. A good technician will lay out repair and replacement costs side by side and be honest when a repair is simply postponing the inevitable.

Rebates, financing and manufacturer warranties can soften the cost of a new system, so ask what is available before deciding.

A Local Name Worth Knowing

The shop at 5555 Bauer Road in Pensacola covers Escambia, Santa Rosa and Baldwin counties with NATE-certified technicians, round the clock emergency repair and a 100 percent satisfaction guarantee. Its crews handle air conditioners, furnaces, heat pumps, ductless systems and indoor air quality upgrades, and estimates on new installations are available by calling (850) 972-1714.

Whatever you decide, do not wait for the hottest week of July to learn what shape your system is in. A short inspection this season can catch salt damage, a clogged drain or an oversized unit while it is still an easy fix.

Every gallon that leaves a sink, tub or toilet in an Iowa City home takes the same route. It drops through a trap, runs along a branch line, joins the main building drain, then travels through a buried lateral to the city sewer under the street. Sewer and drain problems can start anywhere on that path, and the symptom inside the house rarely says where. A gurgling toilet might trace back to a pipe a few feet away or to a root mass sixty feet out under the lawn.

That matters more than many owners expect. In Iowa City, the property owner is responsible for repairs and maintenance from the city main up to and including the building. A cracked joint under the parkway or a sag beneath the front yard is the owner’s to find and fix, and the cost swings widely depending on which stage failed and how it gets repaired.

For owners who want answers instead of guesses, A1 Sewer Service works the line from the drain opening outward. Mechanical drain cleaning restores flow first, hydro jetting follows when grease or roots have coated the pipe wall, and a high-definition video inspection with locating pins down the exact position and depth of any defect before digging comes up. The crew covers Iowa City, Cedar Rapids and the surrounding Johnson, Linn, Iowa and Washington County communities around the clock, and handles excavation and sewer line repair when the camera finds a broken or collapsed section. If a drain keeps slowing or the basement floor drain has backed up even once, book a camera inspection and see what the line actually looks like.

Inside the House: Where Most Clogs Begin

The fixture trap. The curved pipe under each sink, tub and shower holds a few inches of water to block sewer gas. That bend also catches hair, soap scum and toothpaste in bathrooms, and coffee grounds and fibrous peels in kitchens. A clog here affects one fixture only, which is the useful clue. If just the bathroom sink is slow, the problem almost certainly sits within a few feet of the drain, and pulling the trap or running a hand auger usually solves it.

Branch lines. From each trap, wastewater moves through small horizontal pipes, usually 1.5 to 2 inches across, sloped about a quarter inch per foot. Kitchen branches cause the most trouble. Grease leaves the sink warm and liquid, then cools and coats the pipe wall, trapping food particles until the opening narrows to the width of a pencil. Running hot water only moves the grease farther down where it hardens again. When two fixtures sharing a branch drain slowly, like a kitchen sink and dishwasher, the blockage is in the shared line. A cable punches a hole through the buildup, while jetting scours the wall back to bare pipe, which is why grease clogs cleared with a cable alone tend to return within months.

The Building Drain: Where Symptoms Surface

The main building drain. Every branch feeds the largest pipe in the house, typically 3 or 4 inches, running under the basement slab in most local homes before it exits through the foundation. Older houses often have cast iron here, which scales from the inside and can rot through along the bottom where water always flows. Because the basement floor drain is usually the lowest opening on the system, it becomes the overflow point for anything blocked downstream. Water rising from that drain when the washer empties, or toilets gurgling when a tub drains, points past the branches to the main line.

The cleanout. Most homes have a capped access fitting near where the drain leaves the building. It is the entry point for clearing the main and feeding a camera. A cracked or missing cap lets sewer gas in and groundwater out, so it is worth checking on any service call.

Outside the House: Damage You Cannot See

The lateral. The buried pipe from foundation to street is where serious problems develop. Depending on the home’s age, it may be clay tile with joints every few feet, cast iron, PVC, or Orangeburg, a tar-soaked fiber pipe common after World War II that slowly flattens underground. Roots follow moisture escaping from clay joints and grow into dense mats. Freeze and thaw cycles and settling soil can shift a joint out of line or leave a low belly where solids collect. The City of Iowa City recommends inspecting the sewer service at least every five years and having it televised where Orangeburg pipe may be present. A camera run shows the defect, measures its distance from the cleanout, and lets a transmitter in the camera head mark its exact spot and depth on the surface.

The tap at the city main. The final connection, where the lateral joins the public sewer, still belongs to the owner and often sits under pavement. It is usually the deepest and oldest point on the line, so roots and offset joints cluster there. Leaky laterals also let groundwater into a system built only for wastewater, part of a wider problem: the EPA estimates at least 23,000 to 75,000 sanitary sewer overflows occur nationwide each year, and that count leaves out backups into buildings entirely.

Choosing Between Digging and Trenchless Repair

When trenchless works. Once the camera shows what is wrong, the repair method usually follows from the pipe’s condition. If the line still holds its shape and grade but has cracks, root entry points or minor joint gaps, a cured-in-place liner can be pulled through and hardened inside the old pipe, forming a new seamless wall without trenching the yard. Pipe bursting, which pulls new pipe through while fracturing the old one, suits a lateral needing full replacement along a straight run with access at both ends.

When excavation makes more sense. Trenchless methods follow the existing pipe, flaws included. A liner installed through a sagging belly just creates a smooth belly that still holds waste, and a collapsed section stops the liner from passing at all. Flattened Orangeburg, badly offset joints and lines with the wrong slope are usually better handled by digging down to the damage and replacing that stretch with properly graded pipe. Excavation also wins for short, shallow repairs near the foundation, where an open trench costs less than setting up lining equipment. Reviewing the camera footage before deciding is the clearest way to know which category a line falls into, and it gives owners something concrete to compare when quotes start coming in.

Fresh concrete should not be treated as a water-damaged material that simply needs the fastest possible moisture removal. Curing has a different purpose, and environmental changes must respect the requirements of the actual concrete work. Before renting a commercial dehumidifier nearby, ask the responsible contractor to explain the stage of the work and the conditions it needs.

A Richmond Hill property owner may hear that rental equipment can help manage moisture during construction and assume that a larger unit will accelerate every wet-looking process. That assumption overlooks an important distinction. Some moisture is an unwanted condition to address; some belongs to a material process that must be managed according to its specification.

Curing has a purpose beyond a dry-looking surface

The American Concrete Institute defines curing in terms of maintaining moisture and temperature conditions so cement hydration and the development of material properties can proceed. This is the key reason to avoid equating curing with drying. The definition explains the distinction without supplying a household recipe for a particular slab or repair.

For an owner, the useful implication is that appearance is an incomplete guide. A surface looking less wet does not establish that the specified process has been completed or that another stage is approved. Ask the contractor which requirements govern the work and how they will determine that the relevant conditions have been met.

Do not attempt to improve the process by changing the surrounding environment independently. Adding drying equipment, directing airflow or altering heating may conflict with the plan even when the change seems helpful. Describe the desired outcome to the contractor before choosing a machine intended to produce it.

The terminology used onsite should be made clear. Someone may casually say the concrete needs time to dry while referring to a more specific requirement. Ask what decision is actually pending and which document governs it. Clarifying the language helps prevent a casual phrase from becoming an instruction to remove moisture as aggressively as possible.

Keep different materials separate in the discussion. A concrete placement, a repair mortar and an unrelated wet wall should not be assigned one universal treatment because they occupy the same room. Each may need advice tied to its product and condition. The owner’s first task is to make those distinctions visible.

Identify the concrete product and its stage

Gather the description of the actual work from the contractor. Is it a newly placed area, a repair to an existing surface or another cementitious product with its own instructions? The answer should identify what is present, not simply repeat the word concrete. Product and project documentation provide a more useful starting point than the colour of the surface.

Establish when the relevant work occurred and what treatment has already been specified. Do not reconstruct a detailed history from guesses if several trades were involved. Ask the responsible contractor to supply the account needed for the next decision, including any known change to the original plan.

The stage matters to the equipment enquiry. A question during early curing is different from a later question about conditions required for a subsequent finish. The owner should not transfer advice from one stage to another merely because the room and concrete remain the same. Keep the current purpose attached to any recommendation.

If a product instruction or contractor’s requirement seems to conflict with advice from another supplier, have the relevant professionals resolve it directly. A homeowner should not average two different recommendations or select the one that offers the earliest completion date. The apparent conflict may reflect different materials, stages or assumptions.

Discuss any uncertainty before ordering extra equipment. The time spent identifying the correct specification is part of making the hire useful. A unit delivered before its role is established may create pressure to operate it simply because it is already being paid for, even though the material question remains unanswered.

Separate room control from treatment of the new work

There can be more than one environmental concern in a renovation. The room may have an independently assessed moisture issue while new concrete work requires its own conditions. Ask the project lead how those needs will be coordinated. One objective should not silently override the other because it has the more visible piece of equipment.

Where a qualified plan calls for commercial dehumidifier hire in Richmond Hill, Drying Equipment offers a category to investigate. Tell the provider about the fresh concrete and the responsible contractor’s requirements. Confirm suitability for the actual application rather than treating the availability of a commercial unit as approval to use it around any new work.

Explain the area the machine is intended to serve and any boundaries in the project plan. Do not assume that placing it a little farther from the concrete resolves a possible conflict. The relevant professional should decide whether and how the arrangement can meet the project’s requirements.

Keep equipment selection separate from promises about material performance. A rental provider can identify the supplied unit and its instructions. The concrete contractor or other responsible professional must address the specification for the concrete. Confirm the limits of each role so that an equipment recommendation is not misunderstood as acceptance of the finished material.

Also clarify who may change the arrangement. Another trade should not redirect equipment or adjust the room’s conditions merely to make their own task easier. If an operating change is needed, bring it to the person coordinating the environmental requirements before the new arrangement becomes established by habit.

Let the specification govern changes to the environment

A useful project record identifies the required conditions, the person responsible and how changes will be communicated. It does not need to reproduce a technical manual. Retain the applicable instructions and any project-specific direction so that the reason for the arrangement remains available when a different person visits the site.

When the work reaches another stage, ask whether the environmental plan changes and who authorizes that change. Avoid using the rental’s billing period as the trigger. Extending, adjusting or collecting equipment should follow its agreed role within the project rather than an assumption that every process ends when the initial hire expires.

Concerns about unexpected appearance or progress should go back to the responsible professional. Do not add water, heat, coatings or more airflow as an experiment intended to restore an expected look. The appropriate response depends on the material and the actual finding, and may require examination before any treatment is changed.

The owner can evaluate a proposed plan by asking whether its purpose is clear, whether it fits the material’s current stage and whether somebody is responsible for assessing the result. Those questions are more useful than asking only how dry a machine can make the air. Fresh concrete needs the conditions its specification calls for, and successful equipment hire supports that requirement rather than competing with it.

A clogged drain may start with something minor. Perhaps water is not draining from your sink as quickly. If left long enough, that slow drainage may turn into:

  • Standing water
  • Foul odors
  • A backup.

You can often solve the problem at home. Here is how:

Start with the plunger

The first thing to try for a simple clog on the drain is a plunger. Fill the plunger with water until it touches the bottom of the drain opening, press firmly over the drain opening, and press several times, carefully building up pressure.

Most sinks have an overflow opening. Place a moist cloth over the overflow for better sealing. Once the water runs normally, pour warm water down the drain. This will dislodge any other buildup.

Remove visible debris

Some clogs might be near the drain hole. Things like:

  • Hair
  • Food particles
  • Soap residue
  • Other debris.

You can remove them without dismantling the system.

If possible, lift or unscrew the drain cover. Take out any visible material. Do not push debris further down the pipe as this will make it harder to remove.

Do not repeat chemical treatments

Chemical cleaners for clogged drains may seem like a quick answer. But they are not effective for all clogged drains. They can be ineffective at eliminating deeper blockages, such as those that involve:

  • Grease
  • Compacted debris
  • Mineral deposits
  • Other substances.

Repeated application of chemicals at a blocked drain will not solve the problem if a basic method is not working. It can even pose extra security issues to anybody who is required to work with the plumbing system later on.

Use a drain snake for a stubborn clog

A plunger may not reach the blockage of a clog. But a manual drain snake can. Gently insert the cable into the drain until it meets resistance. Then, twist the cable. This will dislodge or trap the blockage.

But do not use the wrong tool or apply too much force. It could cause damage to plumbing parts.

Also, do not push the equipment any further if:

  • You are unable to clear the blockage
  • The drain is still clogged.

Beware of recurring clogs

Is your drain continually clogging? It is telling you something.

The blockage might have been cleared. But there may still be other substances further down the pipe. It could be:

  • Grease
  • Hair
  • Scale.

This is where professional drain cleaning services can help. A plumber can use equipment like a powered auger to reach deeper into the drainage line and loosen stubborn clogs.

Consider professional augering

Drain augering involves using a mechanical cable to bore holes through and dislodge blockages in the pipe. It can be very helpful if plunging hasn’t worked or if a clog occurred in a space that isn’t easily accessed with household tools.

For more complex blockages, other methods such as hydro-jetting or video inspection may be appropriate depending on the condition of the pipe.

Final thoughts

It’s not always necessary to seek professional assistance for a slight obstruction. Start with easy techniques like plunging. But a more complete diagnosis is necessary if the clog is:

  • Persistent
  • Keeps coming back
  • Affects several drains
  • Causes sewage to back up.

Article image

Brown kitchen cabinets are making a big comeback, and it is easy to see why. For years, many homeowners picked all-white kitchens because they looked clean and bright. Then gray cabinets became the top trend. Now, people want kitchens that feel warm, welcoming, and full of character. That is exactly where brown kitchen cabinets shine.

Instead of feeling old-fashioned, today’s brown cabinets look rich, timeless, and elegant. They bring natural beauty into the kitchen while creating a cozy space where family and friends enjoy spending time together.

Whether you are planning a full kitchen remodel or simply looking for inspiration, this guide will explain why brown kitchen cabinets feel so luxurious and how you can use them in your own home.

Why Brown Kitchen Cabinets Are Trending Again

Design trends always change. After years of cool colors like white and gray, homeowners are now choosing warmer spaces.

Brown represents nature, comfort, and quality. Wood tones instantly make a kitchen feel more inviting than flat painted cabinets.

Several design trends have helped brown cabinets return to the spotlight:

  • Natural wood finishes
  • Earth-tone interiors
  • Organic modern design
  • Scandinavian warmth
  • Japandi-inspired kitchens
  • Sustainable materials

People are also spending more time at home than ever before. Instead of kitchens that feel like showrooms, they want spaces that feel lived in and comfortable.

Brown kitchen cabinets offer exactly that balance.

Brown Cabinets Never Truly Go Out of Style

Unlike trendy colors that come and go, brown has always been part of kitchen design.

Real wood has been used in homes for hundreds of years because it offers:

  • Beauty
  • Strength
  • Durability
  • Natural texture

Modern designers simply use brown in fresher ways.

Instead of heavy traditional kitchens, today’s brown cabinets often feature:

  • Flat panel doors
  • Slim hardware
  • Matte finishes
  • Clean lines
  • Hidden handles

The result feels modern while still looking timeless.

The Warmth That White Cabinets Cannot Match

White kitchens look bright.

Brown kitchens feel welcoming.

That emotional difference matters.

When someone walks into a kitchen with rich walnut or oak cabinets, the room immediately feels:

  • Comfortable
  • Relaxing
  • Cozy
  • Elegant
  • Expensive

Wood tones soften the room and make the entire space feel balanced.

Many designers now believe warmth is replacing perfection.

Instead of spotless white surfaces everywhere, homeowners are embracing kitchens with texture and personality.

Natural Wood Creates Instant Luxury

Luxury often comes from natural materials rather than flashy decoration.

Brown kitchen cabinets highlight the beauty of real wood grain.

Every cabinet becomes unique because no two pieces of wood look exactly alike.

Popular luxury wood species include:

  • Walnut
  • White oak
  • Red oak
  • Maple with dark stain
  • Cherry
  • Hickory

The natural patterns inside the wood create depth that painted cabinets simply cannot achieve.

Even engineered wood with high-quality wood veneer can produce a similar premium appearance.

Brown Works With Nearly Every Kitchen Style

One reason brown kitchen cabinets have become so popular is their incredible flexibility.

They fit almost every design style.

Modern Kitchens

Choose:

  • Flat cabinet fronts
  • Walnut finish
  • Black hardware
  • White countertops

The look becomes sleek and sophisticated.

Farmhouse Kitchens

Pair brown cabinets with:

  • White subway tile
  • Brass fixtures
  • Open shelving
  • Farmhouse sink

The result feels warm and welcoming.

Traditional Kitchens

Rich cherry or dark oak cabinets paired with crown molding create timeless elegance.

Rustic Kitchens

Natural wood grain works beautifully alongside:

  • Stone walls
  • Wooden beams
  • Iron lighting
  • Brick backsplashes

Scandinavian Kitchens

Light brown oak cabinets combine perfectly with:

  • White walls
  • Minimal decor
  • Soft lighting
  • Simple hardware

The room feels calm and peaceful.

Brown Cabinets Pair Beautifully With White Countertops

One of today’s most popular combinations includes:

Brown kitchen cabinets + white quartz countertops

This pairing works because it balances dark and light colors.

Benefits include:

  • Bright appearance
  • Natural warmth
  • High contrast
  • Modern elegance

Quartz also reflects light, helping darker cabinets avoid making the room feel small.

Black Accents Make Brown Even Richer

Black details make brown cabinets look more luxurious.

Consider adding:

  • Black cabinet handles
  • Matte black faucets
  • Black pendant lights
  • Black window frames
  • Black appliances

These elements create a designer-inspired look without overwhelming the space.

The contrast makes the wood tones stand out even more.

Brass Hardware Adds Classic Elegance

If black creates a modern style, brass creates timeless luxury.

Warm brass complements brown wood naturally.

Popular choices include:

  • Brushed brass pulls
  • Gold cabinet knobs
  • Brass lighting
  • Warm metallic faucets

The combination feels upscale without appearing overly decorative.

Brown Cabinets Work With Almost Every Countertop

One of the biggest advantages of brown kitchen cabinets is their versatility.

They pair beautifully with many countertop materials.

White Quartz

Bright, modern, and easy to maintain.

Marble

Creates a luxurious appearance.

Butcher Block

Adds even more warmth.

Soapstone

Offers dramatic contrast.

Granite

Provides natural texture and durability.

No matter your budget, there is a countertop that complements brown cabinetry.

Lighting Makes Brown Cabinets Shine

Lighting is one of the biggest secrets behind luxurious kitchens.

Brown cabinets look their best when paired with layered lighting.

Include:

  • Under-cabinet LED lights
  • Pendant lights
  • Ceiling lighting
  • Natural sunlight
  • Interior cabinet lighting

Proper lighting highlights the wood grain and prevents darker finishes from feeling too heavy.

Texture Is the Secret Ingredient

Luxury kitchens rarely rely on color alone.

They combine different textures.

Brown cabinets work beautifully with:

  • Stone backsplashes
  • Quartz countertops
  • Glass cabinet doors
  • Wooden shelves
  • Matte metals
  • Woven baskets
  • Natural linen curtains

These layered materials create visual interest while keeping the kitchen comfortable.

Brown Cabinets Hide Everyday Wear Better

Life happens.

Kids touch cabinet doors.

Cooking creates fingerprints.

Pets bump into cabinets.

Compared to bright white cabinets, many brown finishes hide:

  • Minor scratches
  • Dust
  • Everyday fingerprints
  • Small dents

This makes the kitchen look cleaner between deep cleanings.

That practical benefit is another reason many homeowners choose brown.

Earth Tones Feel More Relaxing

Color psychology plays a major role in interior design.

Brown often represents:

  • Stability
  • Comfort
  • Nature
  • Safety
  • Reliability

These feelings make kitchens more enjoyable.

Instead of feeling cold or clinical, brown cabinets help create a peaceful atmosphere where people naturally gather.

Sustainable Design Loves Wood

Many homeowners now care about sustainability.

Wood cabinets support that movement because they can last for decades.

Instead of replacing cabinets every few years, quality wood cabinets can be:

  • Refinished
  • Painted
  • Restained
  • Repaired

This longer lifespan reduces waste while saving money over time.

Choosing responsibly sourced wood also supports environmentally friendly construction.

Popular Brown Cabinet Shades

Not every brown cabinet looks the same.

Here are some of today’s favorite shades.

Walnut Brown

Deep and luxurious.

Perfect for modern homes.

Light Oak

Bright and airy.

Excellent for Scandinavian kitchens.

Chocolate Brown

Rich and dramatic.

Pairs well with gold hardware.

Espresso Brown

Dark and elegant.

Works beautifully with white countertops.

Honey Brown

Warm and inviting.

Great for family kitchens.

Chestnut Brown

Balanced and timeless.

Fits both modern and traditional homes.

Best Backsplash Ideas for Brown Kitchen Cabinets

Choosing the right backsplash completes the design.

Popular options include:

  • White subway tile
  • Marble slabs
  • Cream ceramic tile
  • Textured stone
  • Beige porcelain
  • Zellige tile
  • Warm gray tile

Avoid overly busy patterns if your cabinets already have strong wood grain.

Simple backsplashes allow the cabinetry to become the main feature.

Small Kitchens Can Still Use Brown Cabinets

Many people worry dark cabinets will shrink the room.

That is not always true.

You can make brown kitchen cabinets work beautifully in small kitchens by adding:

  • White walls
  • Bright countertops
  • Large windows
  • Glass cabinet doors
  • Open shelving
  • Good lighting

These features keep the room feeling open while still enjoying the warmth of wood.

Common Mistakes to Avoid

Even beautiful brown cabinets need thoughtful planning.

Avoid these mistakes:

Choosing Cabinets That Are Too Dark

Balance darker wood with lighter countertops and walls.

Ignoring Lighting

Always plan for multiple light sources.

Using Too Many Wood Tones

Limit yourself to two or three wood finishes for a cleaner look.

Matching Everything

Mix metals and textures instead of making every element identical.

Forgetting Contrast

Add lighter surfaces so the cabinets become the focal point.

Are Brown Kitchen Cabinets Worth the Investment?

In many cases, yes.

Quality brown cabinets offer:

  • Long-lasting style
  • Strong resale appeal
  • Excellent durability
  • Timeless beauty
  • Easy maintenance

Unlike trendy paint colors that may feel outdated within a few years, natural wood remains attractive across many generations of home design.

That makes them a smart investment for homeowners planning to stay in their home or sell in the future.

Simple Ways to Make Brown Cabinets Feel Even More Luxurious

If you already own brown cabinets, you do not necessarily need a full remodel.

Small upgrades can completely transform the look.

Try adding:

These affordable improvements can give your kitchen a high-end appearance without replacing every cabinet.

Final Thoughts

The return of brown kitchen cabinets is more than just another design trend. It reflects a shift toward homes that feel warm, natural, and comfortable. Instead of chasing short-lived styles, homeowners are choosing materials that offer lasting beauty and everyday practicality.

Whether you love the deep elegance of walnut, the softness of light oak, or the richness of chocolate brown, these cabinets can transform almost any kitchen into a space that feels inviting and refined.

With the right lighting, countertops, hardware, and accessories, brown kitchen cabinets create a timeless look that balances luxury with comfort. As more homeowners embrace natural materials and earth-inspired interiors, it is clear that brown cabinets are no longer a thing of the past-they are becoming one of the smartest and most stylish choices for modern kitchens.

Key Takeaways

  • Auto gate system installations are exposed to heavy rain, heat, humidity, and airborne debris throughout the year.
  • Weather conditions can accelerate wear on motors, sensors, electrical components, and moving parts if maintenance is neglected.
  • Regular inspections and preventive servicing reduce unexpected breakdowns and extend the lifespan of gate systems.
  • Addressing weather-related issues early helps avoid more extensive auto gate repair in Singapore.
  • Homeowners and businesses should adapt maintenance routines according to seasonal weather patterns.

Introduction

An auto gate system in Singapore operates outdoors every day, making it vulnerable to changing weather conditions. While modern systems are designed to withstand outdoor environments, prolonged exposure to rain, humidity, sunlight, and debris can gradually affect performance. These factors may lead to slower gate movement, sensor malfunctions, corrosion, or electrical issues if maintenance is overlooked. Understanding how weather influences an automatic gate allows property owners to identify potential problems early, schedule preventive servicing, and reduce the likelihood of unexpected failures that require auto gate repair.

Heavy Rain and Moisture Exposure

Singapore’s frequent rainfall places constant stress on outdoor gate systems. Although most motors and control panels include protective enclosures, water can still enter through worn seals, damaged cable connections, or poorly maintained housing. Excess moisture may affect circuit boards, short electrical connections, or reduce the efficiency of safety sensors. Standing water around the gate track can also interfere with sliding gates by allowing dirt and debris to accumulate, making gate movement less smooth. Routine inspections should include checking drainage around the gate, ensuring protective covers remain intact, and confirming that electrical components remain dry after periods of heavy rain.

High Humidity and Corrosion

Humidity remains consistently high throughout the year, creating conditions that encourage corrosion on exposed metal components. Hinges, brackets, chains, bearings, and mounting hardware can gradually rust if they are not properly protected or lubricated. Corrosion increases friction, places additional strain on the motor, and may eventually lead to mechanical failure. Electrical terminals are equally susceptible, as corrosion can interrupt power delivery and create inconsistent system performance. Applying appropriate protective coatings, lubricating moving parts regularly, and replacing worn hardware before severe deterioration occurs can help maintain reliable operation over the long term.

Heat and Prolonged Sun Exposure

Continuous exposure to direct sunlight affects both mechanical and electronic components within an automatic gate system. High temperatures may cause motors to operate less efficiently during extended use, particularly in systems with frequent opening and closing cycles. Plastic covers, rubber seals, and cable insulation can also become brittle after years of ultraviolet exposure, reducing their ability to protect sensitive components. Remote controls and wireless receivers may occasionally experience reduced reliability if electronic components overheat. Regular servicing allows technicians to identify signs of heat-related wear before they develop into larger operational issues that require significant repairs.

Wind, Dust, and Debris

Strong winds, falling leaves, dust, and small branches can interfere with the normal operation of an automatic gate. Sliding gate tracks may become obstructed by accumulated debris, increasing resistance during opening and closing. Swing gates can experience additional stress when subjected to strong gusts, particularly if hinges have already begun to loosen. Dust entering motor housings or sensor assemblies may reduce operational accuracy or create unnecessary wear on internal components. Keeping gate tracks clean, trimming nearby vegetation, and inspecting sensors after storms are practical measures that reduce unnecessary strain on the system and help minimise the need for auto gate repair in Singapore.

Preventive Maintenance Minimises Weather-Related Repairs

Weather cannot be controlled, but its impact on an automatic gate can be managed through consistent maintenance. Property owners should arrange periodic inspections that include lubrication of moving components, tightening of mechanical fittings, testing of safety sensors, examination of electrical wiring, and verification of motor performance. Early detection of water ingress, corrosion, or worn components prevents relatively minor issues from developing into expensive failures. Preventive servicing also improves overall safety by ensuring that obstacle detection systems, emergency release mechanisms, and remote-control functions continue operating correctly under varying environmental conditions.

Conclusion

Outdoor automatic gates are designed for long-term use, but weather remains one of the most significant factors affecting their reliability. Rain, humidity, heat, wind, and airborne debris each contribute to gradual wear on mechanical and electrical components. Regular inspections, cleaning, lubrication, and timely replacement of worn parts help maintain the performance of an auto gate system in Singapore while reducing the likelihood of unexpected breakdowns. Investing in preventive maintenance also helps property owners minimise the need for extensive auto gate repair, keeping their gate secure, safe, and operating efficiently throughout the year.

Contact San Automation Gate and protect your automatic gate from unnecessary weather-related damage.

Key Takeaways

  • A layered garden combines plants of different heights to create depth, structure, and visual balance.
  • Planning based on sunlight, space, and mature plant size improves long-term maintenance.
  • Mixing trees, shrubs, flowering plants, and ground covers creates a functional landscape.
  • Proper spacing and plant selection reduce overcrowding and encourage healthy growth.
  • A florist in Singapore can recommend suitable species that complement your garden design.

Introduction

A layered garden is designed by arranging plants according to their height, shape, and growing habits. Instead of placing every plant at the same level, this approach creates depth while allowing each plant to receive sufficient light and space. Whether the garden is large or compact, layering helps maximise available space and produces a more organised appearance. That said, when selecting outdoor plants in Singapore, it is important to consider climate conditions, maintenance requirements, and the mature size of each plant before deciding on their placement.

Start with the Tallest Plants

The tallest plants should form the background or focal points of the garden. Small trees, palms, or large ornamental shrubs establish the overall structure and create vertical interest. Positioning these plants first provides a framework for the rest of the landscape. It also helps define shaded and open areas where smaller plants can thrive. Before planting, allow sufficient clearance from buildings, fences, and pathways to accommodate future growth. Planning for mature height rather than current size reduces the need for relocation later and prevents overcrowding.

Add Medium-Sized Shrubs and Flowering Plants

Once the tallest plants are in place, introduce medium-sized shrubs and flowering varieties to fill the middle layer. This section creates visual continuity between the tallest plants and the ground level. Evergreen shrubs provide year-round greenery, while flowering species introduce seasonal colour and texture. Select plants with complementary foliage shapes and flowering periods to maintain interest throughout the year. Medium-sized plants should also be positioned with adequate spacing to promote air circulation, reducing the risk of pests and fungal diseases in humid environments.

Complete the Design with Ground Covers

Ground covers occupy the lowest layer of the garden and provide a finished appearance. These plants help suppress weeds, reduce soil erosion, and retain moisture around larger specimens. Low-growing ornamental grasses, creeping plants, and compact foliage varieties are commonly used to soften edges and cover exposed soil. Besides their practical benefits, ground covers create a smooth transition between planting beds, pathways, and paved areas. Choosing species with different leaf textures can further enhance visual contrast without making the garden appear cluttered.

Balance Colour, Texture, and Shape

Successful layered gardens rely on more than plant height alone. Colour combinations, leaf textures, and plant forms all contribute to a cohesive design. Mixing broad-leaf plants with finer foliage creates visual variation, while repeating similar colours throughout the landscape provides consistency. Flowering plants should be distributed evenly rather than concentrated in one section to avoid an unbalanced appearance. At the same time, limiting the number of different plant species helps maintain a clean and organised design that is easier to manage over time.

Plan for Maintenance and Future Growth

Every plant continues to grow after installation, making long-term planning essential. Consider how much pruning, watering, and fertilising each species requires before adding it to the garden. Plants with similar maintenance needs are easier to manage when grouped together. Irrigation systems should also be designed to reach every planting layer efficiently. Regular pruning prevents taller plants from overshadowing lower-growing species, while periodic inspections help identify pests or diseases before they spread across the landscape. A well-maintained layered garden retains its intended appearance for many years.

Work with Professional Plant Suppliers

Selecting suitable plants becomes easier when consulting experienced suppliers. A reputable florist in Singapore can recommend plant combinations based on available space, sunlight exposure, and maintenance expectations. Professional guidance also helps homeowners avoid selecting species that may outgrow their intended location or struggle under specific site conditions. Many suppliers offer healthy, well-established plants that adapt more successfully after transplantation, supporting stronger long-term growth and reducing replacement costs.

Conclusion

Creating a layered garden requires thoughtful planning rather than simply combining different plants. By arranging trees, shrubs, flowering plants, and ground covers according to height and growth habits, homeowners can develop an attractive and practical landscape. Choosing suitable outdoor plants in Singapore, allowing adequate space for future growth, and maintaining balanced plant combinations contribute to a garden that remains organised and healthy over time.

Contact D’Spring to refresh your outdoor landscape today.

A reliable air conditioning system is essential for keeping your home comfortable during Missouri’s hot and humid summers. While regular maintenance can extend the life of your equipment, every cooling system eventually reaches a point where repairs become less practical than replacement. If your current unit is struggling to keep up, it may be time to explore professional AC installation Augusta, MO, to improve your home’s comfort and energy efficiency.

Knowing when to replace an aging air conditioner can help you avoid unexpected breakdowns, rising utility costs, and expensive emergency repairs. Here are the key signs that it’s time to upgrade your cooling system and what you should consider before making the investment.

How Long Does an Air Conditioner Typically Last?

Most central air conditioning systems have a lifespan of around 10 to 15 years. Some units may continue operating beyond that with proper maintenance, but performance often declines as components wear out.

As cooling systems age, they become less efficient, require more frequent repairs, and struggle to maintain consistent indoor temperatures. Even if an older unit still runs, it may be costing far more to operate than a modern, energy-efficient replacement.

If your air conditioner is approaching the end of its expected lifespan, it is worth evaluating whether continued repairs are truly the most cost-effective option.

Rising Energy Bills Can Signal Reduced Efficiency

One of the earliest signs of an aging cooling system is a noticeable increase in monthly energy costs.

Over time, compressors, motors, and other internal components lose efficiency. As a result, the system must run longer to cool the same amount of space, consuming more electricity in the process.

If your utility bills continue to climb despite similar weather conditions and household usage, your air conditioner may no longer be operating efficiently. Replacing it with a newer model can often reduce energy consumption while improving overall comfort.

Frequent Repairs Add Up Quickly

Every air conditioner may need occasional maintenance, but repeated repair calls are usually a warning sign.

If you’re scheduling repairs every summer or replacing expensive components such as compressors, blower motors, or evaporator coils, the cumulative costs can become difficult to justify.

Many homeowners use the general guideline that if repair expenses are approaching a significant percentage of the cost of a new system, replacement becomes the smarter long-term investment. A new unit provides greater reliability while reducing the likelihood of unexpected breakdowns during peak cooling season.

Uneven Cooling Throughout the Home

Do certain rooms always feel warmer than others?

Uneven cooling can sometimes be caused by ductwork issues, but it may also indicate that your air conditioner is no longer capable of distributing cooled air effectively.

Older systems often struggle to maintain consistent temperatures throughout larger homes, especially during extremely hot weather. If you constantly adjust the thermostat but still experience hot spots, an upgraded system with improved airflow and modern technology may deliver much more balanced comfort.

Strange Noises or Unpleasant Odors

Air conditioners generally operate with a steady, relatively quiet sound. New or unusual noises should never be ignored.

Grinding, banging, rattling, squealing, or buzzing may indicate worn mechanical parts or electrical issues. Likewise, musty odors can point to mold growth, while burning smells may suggest electrical problems.

Although some issues can be repaired, repeated mechanical failures often indicate that the system is nearing the end of its useful life.

Poor Indoor Humidity Control

An air conditioner does more than cool your home-it also helps regulate indoor humidity.

If your home feels sticky or uncomfortable even when the AC is running, the system may no longer be removing moisture effectively. High humidity can make indoor temperatures feel warmer than they actually are while also encouraging mold growth and reducing overall comfort.

Modern cooling systems are designed to provide more effective humidity control, helping create a healthier indoor environment.

Older Refrigerants May Become a Problem

Many older air conditioning systems use refrigerants that are being phased out due to environmental regulations.

If your system relies on outdated refrigerants, repairs involving refrigerant leaks can become increasingly expensive because replacement supplies are limited. In some cases, repairing an older unit simply may not be financially practical.

Installing a new system allows homeowners to benefit from equipment that uses current refrigerants designed to meet modern environmental standards.

Modern Air Conditioners Offer Better Technology

Today’s cooling systems provide far more than basic temperature control.

Many newer models include features such as:

  • Higher energy efficiency ratings
  • Variable-speed compressors
  • Improved airflow control
  • Smart thermostat compatibility
  • Quieter operation
  • Better humidity management

These upgrades not only improve comfort but can also reduce long-term operating costs and make it easier to manage indoor temperatures throughout the year.

Choosing the Right Replacement System

Replacing an air conditioner is not simply about selecting the largest available unit.

A properly sized system should be matched to your home’s square footage, insulation levels, window placement, and cooling requirements. Oversized systems may cycle on and off too frequently, while undersized systems can struggle to keep up during the hottest days.

Working with experienced HVAC professionals helps ensure the new equipment is correctly sized and installed for optimal performance and efficiency.

Installation Quality Matters

Even the most efficient air conditioner cannot perform properly if it is installed incorrectly.

Professional installation includes evaluating airflow, verifying refrigerant levels, inspecting ductwork, and ensuring all components are configured according to manufacturer specifications. Proper installation helps maximize system lifespan, improve efficiency, and reduce the risk of future performance issues.

Investing in quality installation can make a significant difference in both comfort and long-term reliability.

Final Thoughts

An aging air conditioner doesn’t always fail all at once. More often, it gradually becomes less efficient, requires frequent repairs, and struggles to maintain consistent comfort throughout your home. Paying attention to warning signs such as rising energy bills, uneven cooling, frequent breakdowns, and declining performance can help you make an informed decision before your system fails completely.

Upgrading to a modern cooling system offers improved efficiency, greater reliability, enhanced indoor comfort, and lower operating costs. When your current unit reaches the end of its useful life, replacing it with a properly sized and professionally installed system can provide lasting value and peace of mind for years to come.

Key Takeaways:

  • Midtown Atlanta boasts a vibrant mix of culture, green spaces, and diverse residential options, making it a top choice for urban living.
  • Ongoing developments, new parks, and innovative housing projects are transforming the neighborhood’s appeal.
  • Staying informed about the real estate landscape is vital for those interested in buying or investing in Midtown Atlanta.

Table of Contents:

  1. Introduction to Midtown Atlanta
  2. Cultural and Recreational Attractions
  3. Green Spaces and Parks
  4. Residential Developments and Housing Options
  5. Real Estate Market Insights
  6. Transportation and Commuting
  7. Community Engagement and Events
  8. Conclusion

Midtown Atlanta has become a cornerstone of urban sophistication in the Southeast. Defined by both its impressive skyline and lush, walkable neighborhoods, Midtown appeals to professionals, creatives, students, and families seeking a vibrant metropolitan lifestyle. Its streets buzz with the energy of restaurants, art galleries, and events, while still retaining a welcoming sense of community.

As demand continues to grow, Midtown stands out as one of the city’s most sought-after residential destinations. Those interested in exploring available properties can rely on Midtown Homes for Sale, an expertly curated resource by real estate specialist Sara Harper. Sara Harper is widely recognized for her deep market insight and commitment to the Atlanta area, particularly Midtown. Her website connects homebuyers and investors with the latest listings, detailed market analysis, and personalized guidance. With a proven track record and an extensive understanding of Midtown’s housing trends, Sara and her team are trusted authorities for those seeking opportunities in and around this central Atlanta neighborhood.

Cultural and Recreational Attractions

The heartbeat of Midtown Atlanta is its thriving arts and entertainment scene. Anchored by notable institutions like the High Museum of Art, the Atlanta Symphony Orchestra, and the iconic Fox Theatre, residents and visitors are never far from world-class exhibits or memorable performances. Midtown’s cultural offerings attract people from across the region, adding a cosmopolitan flair to everyday life.

Beyond traditional venues, the neighborhood is peppered with public art, boutique galleries, and live music events that encourage discovery and engagement. The Atlanta BeltLine, a transformative urban redevelopment project, connects Midtown to other parts of the city, hosting seasonal festivals and pop-up installations that highlight local creativity and enrich the social fabric.

For more insights into the evolving cultural landscape of Midtown and upcoming events, visit Atlanta Magazine, a trusted source for city happenings and lifestyle features.

Green Spaces and Parks

Despite its urban density, Midtown Atlanta remains committed to green living. The introduction of Midtown Green, a new four-acre park designed for public art, performances, and social gatherings, will strengthen the neighborhood’s reputation as a liveable urban retreat. Midtown Green will offer welcoming spaces for fitness, relaxation, and community activities, complementing iconic Piedmont Park, which serves as the “Central Park” of Atlanta.

These green spaces give residents room to breathe and play, support healthy lifestyles, and provide a natural backdrop for an array of festivals, outdoor concerts, and family-friendly events. Their accessibility makes Midtown an attractive home base for those who seek a balance of city ambitions and fresh air.

Residential Developments and Housing Options

Over the past decade, Midtown Atlanta has experienced significant growth in new housing and mixed-use developments. From rehabilitated historic homes and upgraded lofts to luxury high-rises and modern student accommodations, the area provides a wealth of options for diverse lifestyles and budgets. Notable recent projects include the transformation of landmark sites, such as the conversion of the former Cheetah Lounge into an innovative high-rise student living complex. These forward-thinking developments are reshaping Midtown’s skyline and making urban living in Atlanta accessible to more people.

The variety and constant evolution of available homes mean that both longtime city dwellers and newcomers can find a residence tailored to their needs. Demand is especially high for properties offering proximity to arts, parks, and entertainment, which gives Midtown real estate a competitive edge.

Real Estate Market Insights

Midtown’s real estate market is uniquely varied, featuring everything from early twentieth-century bungalows to sleek new condominium towers. This blend creates a robust inventory for prospective buyers and investors, with varied price points and amenities to suit different preferences. Inventory changes quickly, and buyers are encouraged to familiarize themselves with market trends and neighborhood micro-markets before making decisions.

Working with real estate professionals who know the Midtown area intimately can streamline the home-buying or investment process, ensuring clients gain a clear understanding of value, timing, and opportunity. From working professionals seeking low-maintenance condos to families looking for spacious townhomes near acclaimed schools, Midtown delivers choices that reflect Atlanta’s diversity.

Transportation and Commuting

Midtown’s central location is a major draw for residents with active lifestyles or daily commuting needs. Multiple MARTA stations provide quick, car-free access to major employment hubs, universities, and attractions within the city. The neighborhood is also well-served by bike lanes, crosswalks, and rideshare options, making it easy to move around efficiently, whether by transit, bike, or on foot.

For those who drive, key Interstate highways and main thoroughfares such as Peachtree Street keep the area connected to Atlanta’s greater metro region. This accessibility adds significant value for both renters and homeowners, reinforcing Midtown’s standing as one of the most convenient places to live in the city.

Community Engagement and Events

Midtown Atlanta is more than just a collection of buildings; it is a tight-knit community fostered by regular social gatherings, public art walks, and street festivals. Farmers’ markets provide access to local produce and crafts, while annual events such as the Atlanta Dogwood Festival and Pride Parade draw thousands to the streets in celebration.

Volunteering and participation in local organizations are common, further strengthening community bonds. This spirit of engagement ensures that residents feel welcomed and invested in the neighborhood’s ongoing development, making Midtown a supportive and stimulating place to call home.

Conclusion

With its rich blend of arts, green spaces, and residential options, Midtown Atlanta presents one of the city’s best examples of dynamic urban living. The neighborhood’s growth is guided by a commitment to culture, connection, and sustainability, offering a unique and rewarding experience to anyone considering making Midtown their home or investment destination. Whether attending a world-class performance, relaxing in a scenic park, or finding the perfect urban residence, Midtown stands ready to welcome the next generation of Atlanta residents.