
Author

Clare Louise

Browsing

A bathroom remodel starts with the part you can see: tile, vanity, a new tub. But the success of the project depends on what you cannot see. Pipes, drains and vents run behind the walls and under the floor, and they decide what layouts are possible, how long the work takes and how much it costs. Understanding them before demolition turns surprises into plans.

If you are researching bathroom remodels in Maddison, start with the plumbing conversation. Madison-area homes range from older houses with decades-old pipes to newer builds with modern materials, and each one hides different challenges. Here is a guided look behind the walls.

The Supply Lines: Bringing Water In

Supply lines carry hot and cold water to every fixture. In older homes they may be galvanized steel or copper that has aged, which can mean low pressure, discolored water or hidden leaks. A remodel is the most convenient time to look at their condition, because the walls are open anyway.

If the old pipes are in poor shape, re-piping during the remodel is usually easier than opening the wall again later. Ask your plumber to tell you what material is there now, and what they recommend.

The Drain and Vent System: Taking Water Out

Drains must slope correctly to carry waste away, and vents let air into the system so water flows smoothly and sewer gas stays out. These parts are less glamorous than supply lines, but they decide where a toilet, tub or sink can go.

Moving a toilet or shower to a new spot often means changing the drain and vent runs. That is why a layout change can cost far more than swapping a vanity in the same position.

Old Cast Iron and Hidden Surprises

Houses of a certain age often have cast iron drains. Over time, cast iron can corrode, crack or clog from the inside. Opening the floor for a remodel is a good moment to inspect it. If the pipe is failing, replacement during the project spares you a second round of demolition.

Shutoff Valves: Small Parts, Big Peace of Mind

Each fixture should have its own shutoff valve, so you can stop the water at a single toilet or sink without shutting off the whole house. New valves are inexpensive during a remodel, and they will repay you the first time a supply line fails.

Choosing Fixtures That Use Less Water

Fixtures are where plumbing meets style, and they are also where you can lower water use. The EPA’s WaterSense program says bathrooms account for more than half of the water families use indoors, and that a WaterSense bathroom remodel can save nearly 10,000 gallons of water every year, along with energy and money.

The page points shoppers to the WaterSense label on showerheads, residential toilets and bathroom faucets, which are sold at retailers nationwide. Look for that label when you pick fixtures, and ask your plumber whether the model you like carries it.

Working With a Plumber Who Knows the Territory

The company behind this website, 4 Lakes Plumbing, describes itself as serving Madison since 1995, and lists bathroom and kitchen remodeling, fixture installs, water line relocations, re-piping and cast iron replacement among its services. It also says its work is built to code. When you interview any plumber, ask them the same kinds of questions.

Questions to Ask Before Demolition

  • What material are my supply and drain pipes made of today?
  • Will my new layout require moving drains or vents?
  • Is there cast iron that should be inspected or replaced?
  • Will each fixture have its own shutoff valve?
  • Do the fixtures I chose carry the WaterSense label?
  • Will the work meet local code, and who handles permits?

The Takeaway

A beautiful bathroom is built on good plumbing. Take the time to learn what sits behind the walls, ask questions early and choose efficient fixtures, and the finished room will look great and run quietly for years.


Locks click, gates hum, and a child asks for one more minute at the playground. Safety lives in details like these. Parents researching Linktown Residences usually want proof of good habits, not just glossy words. Ask, look, and ask again. Calm questions get calm, honest answers. Worth the time.

Our checklist covers entry control, lighting, lifts, emergencies, visitors, and teaching children safe habits. No scare tactics. Just sensible checks a family can run during a viewing. Nothing replaces your own eyes, so visit more than once and at different hours. Bring someone who notices what you miss.

Entry Points and Access Control

Start at the front door. Check how residents and guests get in, and how gates, barriers, and lobbies are managed. Families viewing Lentor Signature or similar condos should note whether entry feels controlled but not cold. Watch what happens when someone walks in behind a resident. Tailgating is real.

Look at back entrances, side gates, and car park access as well. A strong front door means little if a side path is wide open. Ask how access cards or codes work, and what happens when one gets lost. A simple system suits everyone. Convenience matters too.

Lighting and Camera Coverage

Good lighting does quiet work. Walk the paths at dusk and after dark, if you can. Look at car parks, stairwells, playgrounds, and pool areas. Dark corners invite worry, even when nothing bad happens. Bright, even light helps parents feel at ease. Evening visits reveal a lot.

Cameras are common, but coverage varies. Ask where they sit and who watches the feeds. Ask how long footage is kept. Visible cameras can discourage trouble, while hidden blind spots can undo the effort. Respect for privacy matters too, so ask how footage is handled and who can view it.

Lifts, Stairs and Corridors

Kids love lifts, which is both funny and risky. Check lift doors buttons and mirrors. Ask how breakdowns are handled and how fast help arrives. Look for clear signs working intercom and bright lobbies. A child stuck alone in a lift needs calm instructions and quick support.

Stairwells and corridors matter too. Look for railings at child height, non slip steps, and clear signs. Check that fire doors close properly and nothing blocks the way. Linktown Residences and its rival can be compared on how tidy and open these shared routes feel. Clutter is a warning sign.

Emergency Plans and Fire Safety

Nobody wants to think about emergencies, yet a minute of planning helps. Ask where the fire exits are, how alarms work, and where residents gather. Look for visible exit signs and fire equipment. Ask when drills or checks happen. A building that treats safety as routine usually handles surprises better.

Make a family plan once you move in. Pick a meeting spot save emergency numbers and walk the exit route together. Show kids how to call for help. Keep a small torch and first aid kit handy. Practice sounds boring, yet in a real moment it turns fear into action.

Visitors and Delivery Rules

Visitors bring warmth and some risk. Ask how guests register, how long they can stay, and how they reach your floor. Delivery riders come and go daily, so ask how parcels are handled. Parcel lockers or a secure counter help keep strangers out of lifts and corridors.

Decide family rules too. Who may open the door, and when? Teach children not to let unknown people follow them in. Agree on a code word with trusted helpers who collect kids from school. Lentor Signature and similar condos give you the stage, but your habits write the script.

Teaching Kids Safe Habits

Technology and walls help, yet habits matter just as much. Teach kids their full name, address, and a parent’s phone number. Practice what to do if they get lost in the compound. Role play makes it stick, and a silly voice makes it fun. Children remember games longer than lectures.

Set clear boundaries for play. Younger kids stay where an adult can see them. Older kids check in at agreed times. Explain why, calmly, and listen to their worries. Safe kids are not scared kids. They are kids who know the rules and trust that help is close.

Conclusion

Family friendly security is a mix of design, management, and daily habits. No single feature does everything. Compare both options on entry control, lighting, lifts, emergency readiness, and visitor handling. Score them honestly. Where answers feel vague, ask again, or ask someone else. Trust earns its place.

Visit at night and on a busy weekend. Watch how staff respond, how neighbours behave, and how your own gut feels. Peace of mind rarely comes from one big gadget. It comes from many small, steady details that work together, day after day. Choose the home that lets your family relax.

Water never stays where it lands. It runs downhill along the slab, slips under baseboards, climbs drywall through capillary action, and soaks into anything porous it touches. The wet patch you can see on the carpet is usually the smallest part of the problem, because most of the water has already moved into places that look perfectly dry from the room.

Frisco homes give that water plenty of room to travel. Most sit on concrete slabs over expansive Blackland Prairie clay, many carry a water heater or air handler in the attic, and the area sees heavy spring downpours along with rare but damaging freeze events such as Winter Storm Uri in February 2021.

Each spot below has its own way of holding moisture, and each one calls for a specific check before anyone declares the job finished.

When a leak, overflow, or storm leaves you with more questions than answers, water damage restoration in Frisco from veteranrestoration.com covers extraction, structural drying, and moisture monitoring until readings confirm the house is dry. The team also offers insurance claim support, including photos and moisture documentation that help homeowners explain the loss to their carrier, though what a policy covers always depends on its terms. You can request water damage help directly through the website.

1. Inside the Wall Cavity

Where it hides: Water that reaches a wall runs down the inside face of the drywall and settles on the bottom plate, the horizontal board sitting on the slab.

What it does: Drywall wicks moisture upward, so the wet line inside the cavity often sits higher than any stain on the painted side. Framing that stays damp can grow mold out of sight.

What to check: Ask whether the crew will take readings at several heights along the wall and whether small inspection or drying holes are needed to move air through the cavity.

2. Under the Flooring

Where it hides: Carpet pad acts like a sponge, and water slides beneath laminate, engineered wood, and vinyl plank until it hits the slab.

What it does: Pad stays wet long after the carpet surface feels dry. Laminate swells at its seams, and wood floors cup as the bottom absorbs more moisture than the top.

What to check: The EPA’s water damage cleanup guidance calls for drying carpet and backing within 24 to 48 hours and confirming the underflooring is dry, so ask how the floor beneath will be measured, not just the top layer.

3. Behind the Baseboards

Where it hides: The narrow gap between baseboard trim and drywall collects water that has run along the floor.

What it does: Trim seals moisture against the lower edge of the wall, where drywall paper and adhesive break down first. Carpet tack strip along that edge can soak through as well.

What to check: Ask whether baseboards will be pulled so the wall base can breathe, and whether the trim can be saved and reinstalled.

4. Insulation in Walls and Attic

Where it hides: Batt insulation in exterior walls traps water that reaches the cavity, and blown attic insulation catches whatever drips from above.

What it does: Wet insulation loses its insulating value, compresses, and presses moisture against the drywall or ceiling behind it. Cellulose tends to settle and clump when soaked.

What to check: Ask whether insulation will be tested or simply replaced, since soaked material often cannot be dried in place.

5. Ceiling Voids

Where it hides: Ceilings beneath upstairs bathrooms, laundry rooms, attic water heaters, and AC condensate pans can hold water on their top surface.

What it does: Drywall ceilings sag under the weight of absorbed water, and joists above can stay damp while the room below looks normal apart from a faint ring.

What to check: Ask whether readings will be taken from above as well as below, and stay out from under any ceiling that bows or bulges.

6. Cabinet Bases and Toe Kicks

Where it hides: Leaks from sinks, dishwashers, refrigerator lines, and garbage disposals run under cabinets and pool beneath the base.

What it does: Many cabinet boxes use particleboard, which swells and softens when wet. The space under the cabinet floor gets almost no airflow.

What to check: Ask whether the toe kick panel will be removed so air can reach the cavity, and whether cabinets can be dried in place or need to come out.

7. The Slab and Its Edges

Where it hides: Concrete absorbs water, and heavy rain against clay soil can push moisture toward the slab edge where it meets exterior walls.

What it does: A damp slab keeps feeding moisture into flooring and the bottom of walls even after the original leak is fixed. Flooring laid too soon can trap it.

What to check: Ask for readings on the concrete itself before new flooring goes down, and check that soil and gutters direct runoff away from the foundation.

8. Wood Framing After the Drywall Dries

Where it hides: Studs and plates hold water deeper and longer than the drywall around them.

What it does: Closing a wall over damp framing seals moisture in, inviting mold and rot behind brand new paint.

What to check: Texas A&M AgriLife Extension’s Dry Out Before Rebuilding guide advises testing studs with a wood moisture meter and waiting until wood measures below 15 percent before insulation and drywall go back. Ask for a final set of readings in writing.

Proof Comes From the Meter

Fans and dehumidifiers do the drying, but moisture readings are what confirm it. Touch and appearance cannot reveal water sitting inside a wall cavity or under a floor. A reliable job ends with documented readings across every affected material, compared against dry areas of the same home, so the rebuild starts on materials that are actually dry rather than ones that only look that way.

A home in Missouri’s Bootheel faces heavier insect pressure than one on the northern plains because of the land itself. The state covers several regions, each with its own climate, soil, and pest mix. A plan built for one part of Missouri can miss what another part deals with. Matching Missouri pest control to the local region ensure the treatment fit a given address.

The Southeast Lowlands Face the Heaviest Pressure

The Bootheel and the southeast lowlands are the warmest, most humid part of Missouri. The flat Delta farmland, long growing season, and standing water give termites, mosquitoes, and ants a longer active season than the rest of the state. Homes here deal with subterranean termites earlier and longer each year. The humidity that helps the crops helps the pests too.

The Ozarks Bring Rock, Caves, and Spiders

South-central Missouri rests on Ozark limestone, full of caves, sinkholes, and cracked bedrock. That karst ground channels water and gives pests a route into foundations from below. Brown recluse spiders are common across the region, along with cave crickets, millipedes, and the rodents that follow the wooded hills. Older stone foundations in the hills add gaps that pests put to use.

The Northern Plains and River Corridors

Northern Missouri is cooler, flatter farm country, where the pest mix leans toward field rodents, flies, and ants moving in from the fields. The big river corridors along the Missouri and Mississippi tell another story. Floodplains and damp bottomland raise mosquito and rodent numbers for the towns beside them. Palisade Pest Control adjusts its approach to these regional differences, so a plan reflects the ground a home is built on.

How River Towns Change the Pest Picture

Water shapes pest pressure as much as climate does. Towns along the Missouri and Mississippi, and along smaller rivers like the James near Springfield, deal with periodic flooding that drives rodents and insects toward higher, drier buildings. Damp basements and crawl spaces after high water give mold-feeding pests and mosquitoes a place to breed. A home a mile from the water can face a different mix than one on the bluff above it. Treatment near a river leans more on moisture control and entry sealing than it does in dry upland neighborhoods.

What the Regional Differences Mean for a Homeowner

A homeowner does not need to study geology to benefit from it. The practical point is that a plan should reflect the local ground instead of a statewide template. A company that works across Missouri can send technicians who know the pests of the Bootheel, the Ozarks, or the river bottoms. Asking how a plan accounts for the local setting is a fair question before hiring. The answer tells a homeowner whether the treatment fits the address or follows a script.

The Pests Missouri Homes Share

Regional differences matter, and some pests press on homes across the whole state. Subterranean termites live in every part of Missouri, though they stay active longer in the warmer south. Mice and rats move indoors each fall statewide, from the Bootheel to the northern line. Ants, spiders, and cockroaches turn up in homes everywhere, with the local mix shifting by climate and housing. A plan accounts for both layers, the pests common to all of Missouri and the ones a given region adds.

Why One Statewide Approach Falls Short

The regional contrasts show why the same plan does not fit every Missouri home:

  • Climate. The humid southeast has a longer pest season than the cooler north.
  • Soil and geology. Ozark karst lets pests in from below, while Delta lowland keeps surface moisture.
  • Water. River and floodplain towns face more mosquitoes and rodents than dry upland areas.
  • Housing. Old stone foundations in the hills and newer slab homes on the plains have different weak points.

Building a Plan Around the Local Ground

Missouri’s pests follow its geography, from the humid Bootheel to the limestone Ozarks to the river bottoms. A treatment plan works best when it starts from the region a home belongs to. A company that treats homes across the state can bring that regional knowledge to each address. Knowing the local ground, climate, and water gives a household a plan built for where it truly lives.

Compact condo units make clever use of space, with built-in storage, multi-purpose furniture and appliances tucked into tight corners. The trade-off is that these same features create many narrow gaps, high ledges and hidden surfaces where dust settles unnoticed. Regular condo cleaning usually covers floors, countertops and bathrooms, but some areas may go untouched for months. Knowing where dust tends to gather can help you keep a small home fresher and reduce the allergens circulating in a confined space.

Aircon Vents and Ceiling Units

Wall-mounted and ceiling cassette aircon units circulate air throughout the day, drawing in dust along the way. Areas that are often missed include the following:

  • Filters that clog quickly when the unit runs for long hours.
  • Louvres and vents where grey dust lines build up and blow back into the room.
  • The top of wall-mounted units, which is hard to see from below.
  • Ceiling grilles and nearby surfaces that collect dust from the airflow.

Tops of Built-In Cabinets and Wardrobes

Many condo units use tall built-in carpentry to maximise storage. The gap between the top of these cabinets and the ceiling is easy to forget, and it tends to hide problems like these:

  • Thick layers of dust that fall when doors are opened or closed.
  • Grease build-up on kitchen cabinet tops near the cooking area.
  • Cobwebs in corners close to the ceiling.
  • Items stored on top, such as boxes or luggage, that trap dust underneath.
  • Signs of moisture or mould where cabinets meet the wall.

Window Tracks and Balcony Doors

Sliding windows and balcony doors are common in condos, and their tracks gather a mix of dust, sand and debris from outside. Units near construction sites can collect fine grit so quickly that some owners turn to providers of industrial deep cleaning services, which often bring HEPA vacuums and specialised brushes for heavy build-up. Spots that need attention include these:

  • Window and door tracks where grit collects and makes sliding stiff.
  • Mesh screens that hold fine dust and pollen.
  • Balcony corners and drainage points that catch wind-blown debris.
  • Window grilles and ledges exposed to dust from nearby roads or construction.

Under Beds, Sofas and Storage Furniture

Space-saving furniture often sits low to the ground or has storage underneath, making it hard to reach with a regular vacuum. The spaces that tend to collect dust include the following:

  • Under platform beds and storage beds with lift-up bases.
  • Beneath sofas and sofa beds with low clearance.
  • Behind and under TV consoles and media units.
  • Inside under-bed drawers, where dust settles on stored linen.
  • Gaps between furniture and walls in tight layouts.

Kitchen Appliances and Exhaust Areas

Compact kitchens often have appliances built tightly into cabinetry, leaving little room for routine cleaning. Places where dust and grease combine include these:

  • The top and sides of refrigerators, especially in recessed spaces.
  • Cooker hood filters and the surfaces around them.
  • The gap between the stove and adjoining countertops.
  • Behind microwaves and ovens set into cabinet niches.
  • Open shelves and spice racks where airborne grease traps dust.

Light Fittings, Fans and Ceiling Corners

Overhead fixtures are often left out of weekly cleaning because they are harder to reach. Dust can build up on surfaces like these:

  • Ceiling fan blades, which spread dust when switched on.
  • Pendant lights and recessed downlights.
  • Curtain rails, pelmets and blind slats.
  • Ceiling corners and the tops of door frames.
  • Smoke detectors and sprinkler covers, which are rarely wiped.

Building Dust Checks Into Your Routine

Dust in hidden areas can quickly affect the whole unit. Adding these spots to a monthly or quarterly checklist, or arranging a periodic deep clean, can help keep the air and surfaces in a small home cleaner over time.

Get in touch with us to arrange a deep clean for your condo.

Once a rental period ends, the sofa, bed or dining set you used is collected and taken away. This scene, for most customers, is the last they see of the furniture. Yet for the provider, a returned item is only partway through its life. Much of the appeal of furniture rental in Singapore lies in the idea that one piece can serve several households over time, reducing the number of items bought new and thrown away. Understanding what happens behind the scenes can help you see how the lifecycle works and what it means for the furniture you receive.

Collection and Inspection

The process begins as soon as the furniture leaves your home. Once it reaches the warehouse, staff usually check each item carefully, looking at points like these:

  • Structural soundness, such as wobbly legs, loose joints or sagging frames.
  • Surface condition, including scratches, dents, stains and fading.
  • Missing parts, such as screws, cushions, shelves or drawer handles.
  • Odours, moisture or signs of pests that need special treatment.
  • Whether any damage goes beyond normal wear and affects the deposit refund.

Cleaning and Sanitising

Returned items typically go through cleaning before they can be used again. The methods depend on the material, and the process commonly includes steps such as these:

  • Steam cleaning or shampooing fabric sofas, upholstered chairs and headboards.
  • Wiping and disinfecting wooden, metal and laminated surfaces.
  • Treating leather with cleaners and conditioners to prevent cracking.
  • Washing or replacing removable covers and cushion inserts.
  • Using anti-mould or anti-pest treatments, which matter in a humid climate.
  • Airing and deodorising items before they return to storage.

Repairs and Refurbishment

Items that show wear are often restored rather than discarded. That said, for people renting furniture in Singapore, this stage is a large part of why returned pieces can still look presentable for the next household. Common refurbishment work includes the following:

  • Tightening or replacing hinges, screws and drawer runners.
  • Touching up scratches and chips, or refinishing worn tabletops.
  • Reupholstering sofas and chairs with new fabric or foam.
  • Replacing damaged components, such as bed slats, legs or glass panels.

Grading and Re-Renting

After cleaning and repair, furniture is often graded by condition to decide where it goes next. This sorting usually leads to outcomes like these:

  • Pieces in near-new condition return to the main rental catalogue.
  • Items with minor cosmetic wear may be offered at lower rental rates.
  • Some furniture is set aside for short-term uses, such as home staging or events.
  • Popular items may be paired with new pieces to complete sets.
  • Damaged sets may be split so usable pieces can be rented individually.

Selling Ex-Rental Furniture

Once an item has completed several rental cycles, providers may decide to sell it rather than rent it out again. This stage typically involves the following:

  • Clearance sales of ex-rental furniture at reduced prices.
  • Offering current customers the option to buy items they already have at home.
  • Selling to second-hand dealers or businesses furnishing offices or staff housing.
  • Listing pieces through online marketplaces.
  • Bundling ex-rental items into discounted starter packages for new homeowners.

Donation, Recycling and Disposal

Eventually, some furniture reaches a point where it can no longer be rented or sold. Rather than sending everything to waste, providers may take approaches such as these:

  • Donating usable items to charities, shelters or community organisations.
  • Separating materials such as metal, wood and glass for recycling.
  • Repurposing parts, such as frames or legs, for repairs on other items.
  • Arranging licensed disposal for pieces that cannot be reused.

Closing the Loop

The life of rental furniture extends well beyond a single lease. Inspection, cleaning, repair, resale and recycling all help keep pieces in use for longer, and knowing these steps can make it easier to ask providers how they care for the items they deliver to your home.

Contact us at Lian Huat to learn how we clean, refurbish and care for every piece we deliver.

Illuminating Insights at a Glance

  • Multi-storey homes often suffer from dark central zones, which can be effectively resolved through strategic daylighting techniques.
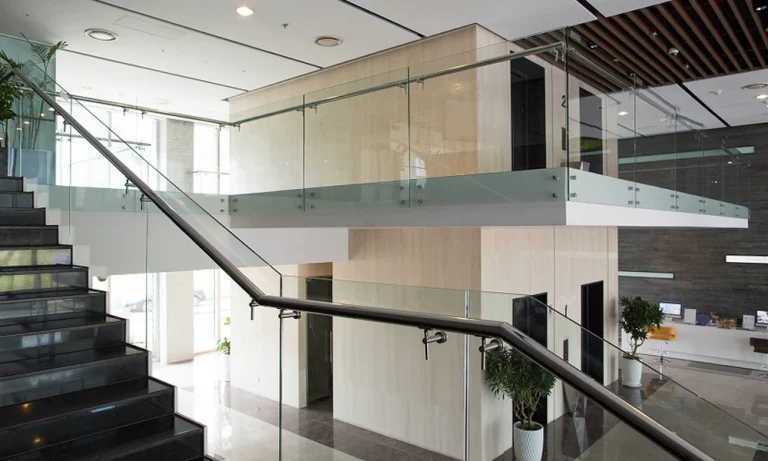
  • Architectural features such as vertical light wells, glass floor panels, and open riser staircases penetrate daylight across multiple levels.
  • Optimised natural illumination enhances mental well-being, lowers energy consumption, and visually expands interior living spaces.
  • Partnering with expert builders in Singapore ensures seamless structural integration of large glazing and skylights tailored to the local climate.

Awakening the Core of Multi-Storey Living

Multi-storey living offers generous space and privacy for growing families, yet deep floor plates often result in dim lower levels or gloomy central corridors. In high-density urban environments, thoughtful daylighting becomes a vital pillar of sophisticated Singapore landed house design. By inviting sunlight deep into every corner of the dwelling, you transform internal rooms from feeling confined to expansive and uplifting.

Beyond aesthetic allure, natural light plays a vital role in setting the tone and mood of a sanctuary. Sunlight highlights architectural textures, enhances natural material finishes, and regulates daily circadian rhythms. Whether you are constructing a new multi-tiered terrace or modernising an existing semi-detached home, understanding how daylight moves through multi-level spaces allows you to create brighter, more energy-efficient interiors tailored for contemporary living.

Why Is Natural Light Essential in Multi-Storey Homes?

Designing multi-storey properties presents unique spatial challenges. As floors stack vertically, lower storeys and central zones can easily become shielded from side windows. Integrating natural illumination effectively balances lighting throughout the entire structure, ensuring that ground-floor living areas feel just as vibrant and welcoming as upper-floor bedrooms.

The physiological and visual advantages of well-lit spaces are substantial:

  • Visual Expansion of Space: Sunlight eliminates dark shadows in corners, making compact or narrow rooms appear significantly larger and airier.
  • Enhanced Health and Wellbeing: Exposure to daylight boosts daily productivity, elevates mood, and supports healthy sleep-wake cycles.
  • Energy Efficiency: Maximising daylight reduces dependence on artificial lighting during daytime hours, lowering overall electricity consumption.

Key Architectural Features for Vertical Light Distribution

To carry sunlight across multiple floors, professional builders in Singapore employ specialised architectural elements designed to channel light vertically and horizontally.

Architectural Feature Mechanism of Action Primary Benefit
Central Light Wells & Voids Vertical shafts cut through upper floors to let roof light filter down. Illuminates core living zones on lower floors without compromising structural integrity.
Glass Floor Panels Walkable structural glass integrated into upper floor walkways or landings. Passes overhead light directly down while maintaining usable floor area above.
Open Riser Staircases Stairs designed without solid vertical risers, paired with glass balustrades. Transforms stairwells into active light shafts instead of dark structural blocks.
Skylights & Lantern Roofs Roof glazing positioned directly over staircases, light wells, or attics. Captures top-down daylight consistently throughout the day.

How Can You Balance Daylight and Thermal Comfort in Tropical Climates?

While introducing daylight is desirable, tropical environments demand careful management of solar heat gain and harsh glare. Excessive direct sunlight can raise indoor temperatures, forcing air conditioning systems to work harder. Achieving an inviting, bright home requires an integrated design strategy that balances light admission with effective thermal protection.

Consider incorporating these proven solutions during design planning:

  • Low-E and Tinted Glazing: High-performance glass coatings block harmful UV rays and reduce infrared heat transfer while allowing visible light to pass through freely.
  • Architectural Louvres and Screens: External timber or aluminium louvres diffuse intense afternoon sun, creating soft ambient illumination indoors.
  • Deep Overhangs and Balconies: Strategic roof eaves shade large glass facades during peak sun hours, preventing thermal buildup.

Transform Your Home with Sim The Builder

Unlocking the full potential of a multi-storey residence requires an expert approach to spatial volume, structural engineering, and light management. Tailored Singapore landed house design seamlessly blends aesthetics with functional daylighting strategies to craft homes that feel expansive, luxurious, and deeply comfortable.

As trusted builders in Singapore, Sim The Builder delivers end-to-end design and build expertise. From conceptualising architectural light voids to executing precision structural glass installations, our team ensures your multi-storey property is beautifully illuminated and built to last. Contact Sim The Builder today to discuss how we can transform your landed home into a light-filled sanctuary.

A useful carpet-cleaning area estimate describes the floor included in the proposed job. It does not start with the total square footage in a property listing. Break irregular rooms into simple shapes, keep your units consistent and label what is excluded. The resulting figure can help a rental conversation without pretending to predict machine capacity or the time needed for the work.

Split an awkward room into rectangles

Consider an illustrative L-shaped family room in Richmond Hill. One rectangular part measures 5 metres by 4 metres. A second part, extending beside it without overlapping, measures 3 metres by 2 metres. The carpet covers both parts. Multiplying each pair of dimensions gives 20 square metres and 6 square metres, for a combined 26 square metres.

The no-overlap detail is important. If you measure a large outer rectangle and also add the projecting part, you can count the same carpet twice. A quick sketch helps reveal this. Draw a line where you divide the L into rectangles and write each dimension on the shape it describes. The dividing line is a calculation aid, not a proposed seam or a boundary for using equipment.

You can check this example another way. Imagine the same room fitting inside a 5-metre-by-6-metre outer rectangle, with a 2-metre-by-2-metre corner missing. The full rectangle is 30 square metres; subtracting the missing 4 leaves 26. This second calculation only works if those dimensions genuinely describe the same L shape. It is a way to check the sketch, not a reason to invent missing measurements.

For a first enquiry, an approximate measurement can still be useful if it is labelled approximate. Use what you can measure safely and leave inaccessible dimensions uncertain. There is no need to climb over furniture or pull up carpet to supply a number. If a bay, curved wall or unusual recess makes the estimate difficult, describe that feature and ask what detail the provider needs.

Keep the closet and the hard floor on separate lines

Now add a carpeted closet measuring 2 metres by 1.5 metres. It contributes another 3 square metres if it is part of the job. Beside the room is a tiled entrance of 4 square metres. That entrance belongs on the sketch for orientation, but it does not become carpet because the household calls the whole space the family room.

The example can be recorded in four short lines:

  • Main rectangle: 5 × 4 = 20 square metres.
  • Non-overlapping extension: 3 × 2 = 6 square metres.
  • Carpeted closet: 2 × 1.5 = 3 square metres.
  • Included carpet total: 29 square metres; adjacent tiled entrance excluded.

The closet changes the total only if its 3 square metres were outside the rectangles already counted. A recess that is included in your original measurement cannot be added again merely because it has a separate door. Write the dimensions beside the drawing before adding the figures. It is easier to catch double counting when each number has a visible location.

Keep separate floor coverings identifiable as well. An area rug over tile is a separate textile with its own care decision, not an automatic addition to a fitted-carpet booking. A carpeted staircase also needs its own description. Do not flatten every different surface into one area total and assume that a suitable method or accessory follows from the arithmetic.

Use exclusions to describe scope without hiding the floor

Suppose a large cabinet will remain in place and the household proposes cleaning only the accessible carpet. You can give both the total carpeted area and the approximate area intended for treatment. Label them explicitly. “The room and closet contain about 29 square metres of carpet; the proposed accessible portion is smaller” communicates more than silently subtracting an estimated cabinet footprint.

That distinction gives the person advising a chance to question the scope. They may need to know whether the excluded area is simply outside the routine task or whether an unresolved concern extends beneath it. Measuring the accessible floor does not establish the condition of the covered carpet. Keep an ordinary maintenance estimate separate from any assessment following a water event.

If the Richmond Hill carpet-extractor page is where your equipment research begins, explain that this estimate concerns a proposed routine clean. Ask whether the water-recovery equipment offered matches that assignment before booking it. A rental enquiry is clearer when “29 square metres” is followed by “fitted carpet in the family room and closet” rather than left as an unexplained number.

Do not turn the sketch into operating instructions. It need not prescribe how many passes to make, how much solution to use or how to place drying equipment. Those decisions depend on the material, approved method and supplied machine. The sketch’s job is narrower: to prevent a conversation about one area from becoming a booking for an entirely different scope.

Give the area a unit and a purpose

Write “square metres” or “square feet” each time a total could be ambiguous. A room measured in metres does not produce a square-foot result by multiplication alone. Convert the lengths to a common unit before multiplying, so a measurement in feet multiplied by one in metres is not mislabelled as square feet or square metres. Retain the original measurements when recording a conversion.

Keep sensible precision. Measurements estimated around furniture do not justify several decimal places in the total. A rounded figure marked approximate is more honest. If two household members obtained noticeably different totals, compare their sketches and inclusions before averaging the numbers. One may have counted the closet while the other included the tiled entrance.

Area is only one part of the enquiry. Two rooms with equal carpet area can differ in shape, stairs, access and the amount of preparation involved. No arithmetic in this example establishes a cleaning rate, rental duration or drying deadline. Supply those other facts in plain language so the measured total supports the discussion without being asked to answer everything.

If uncertainty remains, send two labelled figures: the estimated total carpet and the estimated portion proposed for cleaning. Include the small sketch that explains them. A reader can work with an honest range and a visible boundary; an impressively precise total assembled from hidden assumptions is harder to correct.

In warm weather, a swimming pool can be much more than just a place to cool down. It may become a unique element that enhances a home’s architecture and fosters a friendly outdoor space with careful design decisions. Tile gives a great deal of flexibility in terms of color, texture, pattern, and visual character among the many materials that may be used to customize a pool.

Homeowners may go beyond a typical pool design and create a swimming area that feels unique by selecting the appropriate glass pool tile. Different tile designs may drastically alter the ambiance around the water, from delicate waterline accents to vivid mosaics and dazzling feature walls.

Using Color To Create Character

When choosing pool tile, color is often one of the first factors taken into account. Because they naturally go well with water, traditional blue hues are still popular, but homeowners are no longer constrained by a restricted color scheme. Different effects may be produced using aqua, turquoise, teal, navy, white, green, and even darker tones.

While richer hues could give the pool a more striking visual presence, lighter hues might help create a feeling of freshness and airiness. The decision may also be influenced by the property’s exterior finishes and the surroundings. Instead of seeming like a stand-alone element, the pool may be integrated into the overall outdoor design thanks to a well-chosen color scheme.

Uncovering The Allure Of Mosaic Designs

Mosaics provide a way to add more intricacy without overpowering the overall style of the pool. You may arrange little pieces to create gradients, repeating patterns, creative combinations, or beautiful accents.

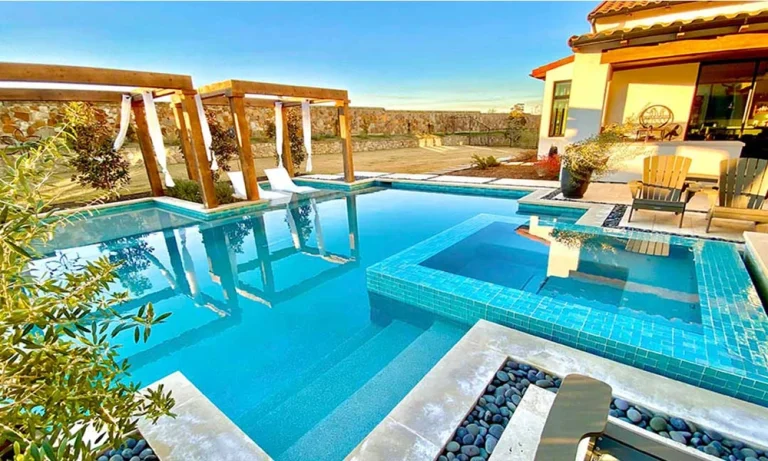
While some homeowners utilize intricate patterns in certain spots, others choose a uniform mosaic pattern across the waterline. With careful tile design, steps, benches, fountains, elevated spas, and shallow lounging spaces may all become eye-catching focal pieces.

Multiple hues from the same color family may also be combined in mosaic patterns. This keeps the swimming area’s look consistent while producing visual diversity.

Increasing Dimension And Light

The way glass reacts to light is one of its unique characteristics. As sunlight passes over the swimming pool during the day, reflections may shift. After sunset, underwater illumination may provide a new dimension by making certain surfaces look brighter or more prominent.

Depending on lighting, viewing position, and water movement, a well-selected glass pool tile may create subtle changes in appearance. Glass may provide dimension and visual movement instead of producing an entirely homogeneous surface.

Because of this feature, homeowners who want to keep their pool visually appealing without depending on very intricate designs will find it especially helpful.

Examining Various Tile Finishes

Color is not the only factor that determines style. The entire look of the swimming area may be greatly impacted by the tile’s polish.

While softer surfaces could provide a more subtle look, glossy finishes can produce a polished and shiny image. When seen from various angles, iridescent surfaces may exhibit shifting tones. In ornamental areas, dimensional and textured alternatives may provide more personality.

When choosing a finish, it’s important to think about the tile’s installation location and how it will work with adjacent materials. Stonework, landscaping, pool decking, coping, and outdoor furniture may all affect how harmonious a finish seems.

Organizing The Pool With The Outdoor Environment

A customized pool area should blend perfectly with its surroundings. Tropical environments might use lively mosaics and brighter tones, while modern dwellings could benefit from simple patterns and controlled color schemes. Rich blues and ornamental designs may complement outdoor settings with a Mediterranean flair.

The property’s architecture might provide helpful guidance. The swimming pool may seem to be a deliberate extension of the house by using recurring hues or other visual elements that are already present throughout the house.

Building A Pool With Durable Visual Appeal

Selecting the most daring design is not always necessary for personalization. Sometimes a simple mosaic border or a well-chosen color scheme may provide enough uniqueness to make a swimming pool unforgettable.

Homeowners may experiment with color, reflection, patterns, and feature areas in a variety of ways thanks to the adaptability of glass pool tile. An outdoor swimming area that seems unified and uniquely personal may be created by taking into account the pool itself as well as the surrounding materials, architecture, lighting, and landscaping.

Specifying for the Roof You Have, Not the Product You Know

Waterproofing failures on concrete roofs rarely come down to a defective product. Far more often, a membrane performing well on one project fails on another because the two roofs differ in exposure, movement, drainage, or substrate condition, and the specification was carried across unchanged. Engineers selecting a waterproof coating in Singapore work in a climate that compounds this: intense UV, heavy rainfall, and sustained heat all test a membrane simultaneously. Five factors shape whether a specification holds up over years or fails within a few.

1. UV Exposure and Whether the Membrane Is Left Exposed

An exposed roof membrane takes continuous ultraviolet exposure, which degrades many polymers, causing chalking, embrittlement, and eventual cracking. Some membranes are formulated for permanent UV exposure; others are intended to be covered by screed, tiles, or ballast and will deteriorate quickly if left uncovered.

Establishing at the specification stage whether the membrane will remain exposed determines a large part of the product selection, and it’s a detail that occasionally changes during construction when a planned finish is value-engineered away without revisiting the waterproofing.

2. Ponding Water and the Roof’s Actual Drainage Performance

Flat concrete roofs frequently hold water in low spots regardless of design falls, and prolonged ponding is a considerably harsher condition than intermittent wetting. Some membranes tolerate standing water indefinitely; others are rated only for water that drains away.

Where falls are marginal or the existing roof already ponds, specifying a membrane rated for permanent water immersion is more reliable than assuming drainage will improve. Correcting falls during the works is often worth considering alongside the coating itself.

3. Substrate Condition and Movement Characteristics

Concrete moves. Thermal cycling, structural settlement, and shrinkage all produce cracking, and a membrane with limited elongation bridges nothing. Roofs with existing cracks, movement joints, or structural characteristics suggesting future movement need a membrane with meaningful crack-bridging capability.

Substrate condition also governs preparation: moisture content, laitance, contamination, and surface profile all affect adhesion, and inadequate preparation causes more failures than product selection does.

Matching Coating Characteristics to Roof Conditions

Roof Condition Specification Priority Risk if Mismatched
Permanently exposed membrane UV-stable formulation Chalking, embrittlement, cracking
Ponding in low areas Rated for permanent water immersion Blistering, adhesion loss, delamination
Existing or anticipated cracking High elongation, crack-bridging capability Membrane splits along substrate cracks
Trafficked or maintenance access Mechanical durability, protective layer Puncture and wear at access routes
Tight programme, humid conditions Cure characteristics suited to site conditions Incomplete cure, compromised performance

4. Traffic and Maintenance Access Requirements

Roofs carrying services, whether air-conditioning plants, solar panels, or antennae, receive foot traffic during maintenance. A membrane adequate for a non-trafficable roof may be punctured or worn at access routes and around equipment bases.

Where traffic is expected, either a more mechanically durable system or a protective layer over designated walkways prevents the localised damage that usually initiates leaks.

5. Application Conditions and Programme Constraints

Liquid-applied membranes have specific requirements for temperature, substrate moisture, and cure time between coats. Singapore’s humidity and unpredictable rainfall complicate this, and a product requiring extended dry conditions between coats may be impractical on a tight programme during a wet period.

Discussing realistic site conditions with a construction materials supplier in Singapore before finalising the specification allows a product to be selected that the applicator can actually install correctly, which matters more than marginal differences in laboratory performance.

Confirming the Specification Before Materials Are Ordered

The most reliable approach documents the roof’s conditions first – exposure, drainage behaviour, substrate condition, expected traffic, and programme – then selects against them. Where a roof is being recoated rather than newly built, compatibility with any existing membrane also needs checking, since some systems cannot be overlaid. Engineers who bring this information to a construction materials supplier in Singapore, rather than requesting a quotation against area alone, generally receive a recommendation suited to the actual roof, and a waterproof coating in Singapore specified that way stands a far better chance of reaching its intended service life.

Contact Ardex – Quicseal Singapore to discuss your roof’s exposure, drainage, and substrate conditions before specifying a waterproofing system.